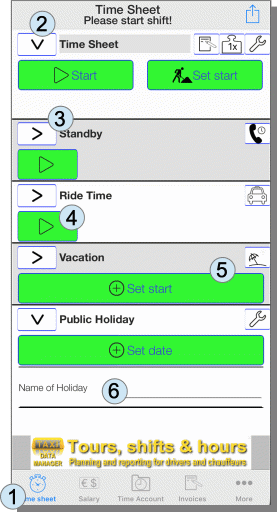
The main menu (1) “Time Sheet” houses the stopwatches (timers). The start and end times for shifts are set here.
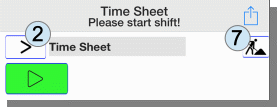
There is an abbreviated (3) representation (‚>‘, which usually only consists of start, pause and stop buttons in the CD player optics.
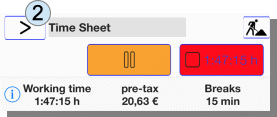
This is a prompt mode: you start the shift with the start button and end the shift with the end button, that’s it.
The detailled times can be set in the complete (2) display (‚V‘). This is the mode for entering times afterwards, correcting errors or making entries for the future.
This layout uses colored buttons. This setting can be changed (Config → system menu → change layout) and other layouts with monochrome buttons could be selected.
The activated timer types in the basic configuration are (2) “Time Sheets”, (3) “Standby” and (4) “Ride Time”. In addition to the basic setting there is the ability to create vacation days, public holidays, sick days and project timers.
In the above image, an advertising banner is also shown in the bottom area. This app can be downloaded for free from the Apple App Store. The development is financed through the display of advertising (Google and own offers). Advertising can be hidden by an in-app purchase and functional restrictions of the free version can be lifted.
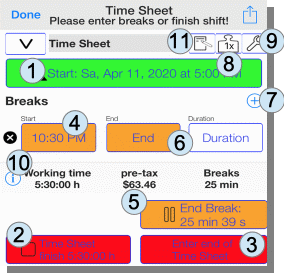
If the start button (1) has been pressed in the complete display, the display opens. You could set the end of working time to the current time immediately with the button (2). If you want to set a time other than the current time, you take the button (3) and a menu appears to exactly set the time.
When opening the working time menu, the breaks are also shown. In the picture, a pause is activated with the pause start button (4). The pause can be ended with the end pause button (5). The buttons (6) “End” or “Duration” are suitable for explicitly setting the end of the break or setting the duration directly.
Further breaks entries can be added with the ‚+‘ button (7). To
weight the working time for a shift if necessary, please press button
(8). To make further configurations, please click button (9).
Behind
the invoice symbol (11) you’ll find the possibility of calculating
individual timesheets as a service to customers.
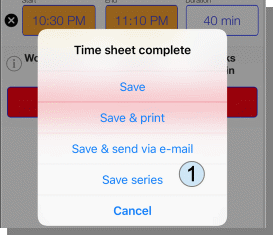
When saving, you can reproduce the entry by selecting the option “Save series” (1):
Pingback: Manual for App "Times & Wages" - sb-apps.com