Once the form data regarding for the invoicing entity has been entered, work continues on the details for an invoice.
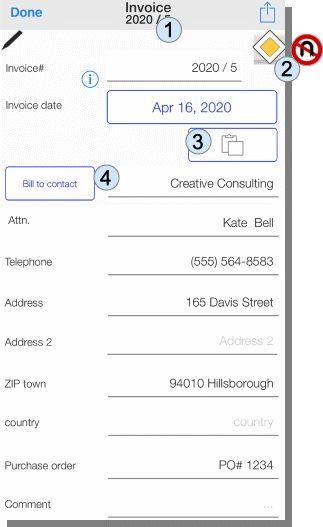
The invoice numbers (1) can be provided with a prefix as well as a postfix. The last number in the string for the invoice is recognized as a consecutive number and incremented. If you e.g. “2020 / 5” was the last invoice number, “2020 / 6” is generated as the next invoice number.
The “Right of Way” sign (2) indicates that changes are still being made here. The sign “Reversal prohibited” means that no changes can be made. Clicking on the sign switches the state from “read-only” to “writable” and vice-versa.
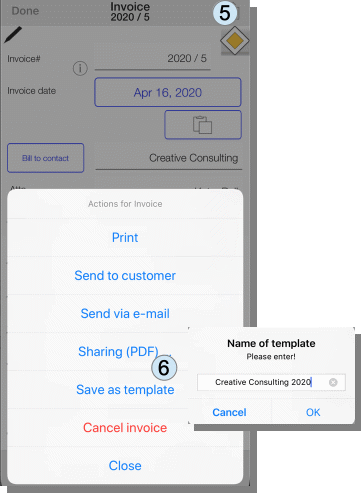
If you want to write additional invoices to a certain customer again later on, you can save the current filled form as a template (6) in the system menu (5) with a name.
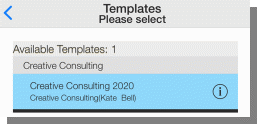
If you want to call up these templates again, you can use the button (3) to select from the existing templates.
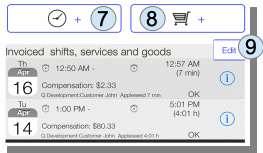
The billing contact can also be selected from the address book of the iPhone / iPad (4). If you want to add more lines to the invoice, you can (7) add more shifts as well as articles / products / other (8).
If articles have already been created, the article must be selected (10) and the number of articles for the respective invoice must be specified (11). A preview of the invoice line with VAT calculation is also displayed.
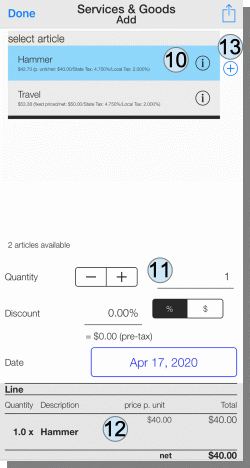
A new article can be created by pressing the ‚+‘ button (13).
The order of the lines in the calculation can be changed using the “Edit” button (9).
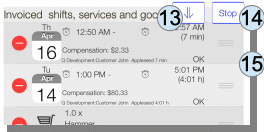
With the “arrow down” (13) you can completely reverse the order.
Individual entries can be moved by moving the 3 bars (15) on the right.
Clicking on “Stop” (14) leaves the mode in which you can change the position of the invoice lines.
Pingback: Manual for App "Wages & Times" - sb-apps.com
Hi!
How do I change the tax type in the invoice?
My invoices are tax free. I can’t find how to change tax type.
Thank you
Valeria
Hi Valeria,
there are several ways to achieve tax-free invoicing:
– when you enter a booking there is a list of available taxations labeled „taxation for fare“. Depending on your country there are some taxations setup: IN US for example „CA Tax“, „NYC tax“ and at the bottom of the list „Tax exempt“ for tax free invoicing. When you select this, the tax for this tour is set to 0%. This is per tour base
– in the config-menu there is a section dedicated to „taxation“. You can add you own taxation with the ‚+‘-Button and define two values for two different taxes, that might be added.
When you select this tax as „standard tax rate used for trips“ this becomes the default for all future trips entered.
When you select this tax as „standard tax rate used for goods“ this becomes the default tax rate for additonal items in the invoice
When you create an article you can also define the tax rate on an article level.
s.a.: http://apps.sb-apps.com/article-creation/
I hope this helps.
Best regards sb-apps.com Support