You can adjust the invoices below the display of the invoice preview.
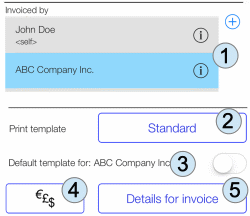
Different billing identities can be added and selected (1). For each identity, separate information about the name of the company, address, bank details is created. By clicking on the current template (2) (here still “Standard”) you can define the logo and further details of the invoice.
You can set a template as default for an identity, so that when you change your identity with (1) the appropriate template is automatically selected.
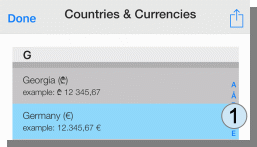
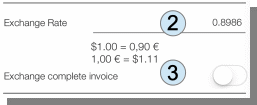
Last but not least, a second currency can be selected under (4) and an exchange rate can be added. The final amount can then also be shown in a second currency. On the right-hand side, you can get to the country you are looking for faster by clicking on the first letter (1). The exchange rate can be entered after selection under (2). If the switch (3) is activated, the entire invoice will be issued in the desired currency.
To get English texts if necessary, you can select the language and the region accordingly by changing the iOS settings. In addition to German, English and Spanish are also supported.
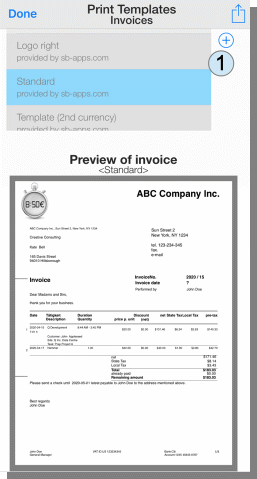
If you click on (2) Print template “Standard” (s.a.) the menu “Print templates” appears. The standard templates are marked in grey and cannot be changed.
The button (+) (1) creates a copy of the selected template that can be changed.
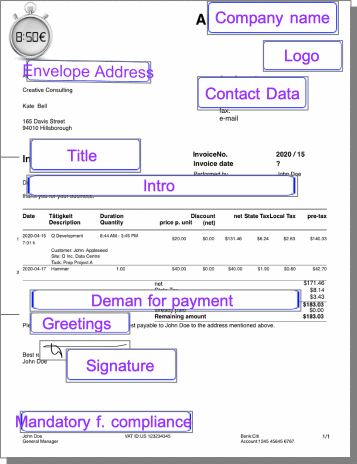
Buttons (for the iPhone under the selection field) appear for the templates for the fields in the template that can be changed.
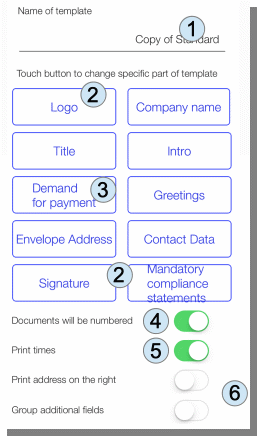
The name of the template is used for recognition (1).
The automatic numbering of the receipts can be switched off. (4).
The time is usually printed, what can be prevented with the switch (5).
If envelopes with a viewing window on the right side are used, the switch (6) can be used to print the address on the right side. The contact details are then printed on the left.
The logo (2) and the signature (2) can be scanned or photographed or selected from the iOS Photos app. The mechanism works in the same way as described in the chapter “Changing the logo for the time sheet”.
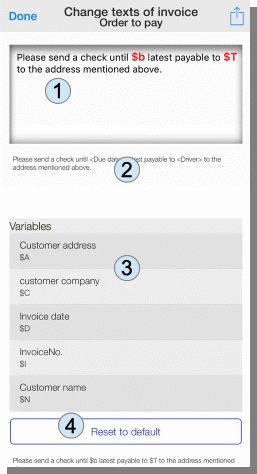
The remaining fields (3) offer configuration options for individual texts in the documents. If you click e.g. on the button “Demand for payment” the menu “change texts of invoice” appears.
The variables are marked with a ‚$‘ character. In the field (1) you can both delete the entire text or only change parts. The variables are contained in the selection list (3) and can be inserted from there with a click at the cursor or can also be entered with the keyboard. The current replacement of the text is displayed below of the input field (2). With a click on (4) the text can be reset to the origin.
With a click on „Done“ it goes back and you can review the result.
Pingback: Manual for App "Wages & Times" - sb-apps.com